Unity Physics: Fixed, Hinge and Spring Joints
If you have complex objects with moveable parts in your game or application, Unity has a lot of physics based solutions through joints. Let’s take a look at some of the options available.
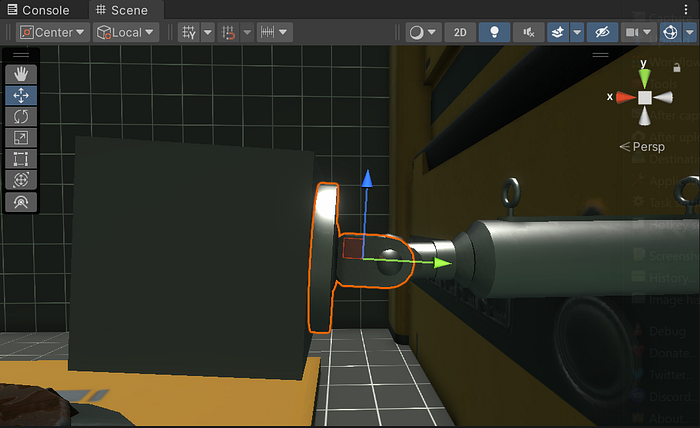
In this article, I will be working with this cube primitive and hydraulic arm game objects.

Here are the two objects in the Hierarchy.

Fixed Joint
The cube object has a rigidbody component with gravity enabled.


The Fixed Joint component on the cube needs a reference to the Connected Body, which is the rigidbody component on the object you want it to be fixed to. The Break Force value determines how much force needs to be applied to the object to break it away from the connected body. A value of infinity will ensure that the joint never breaks. The same applies with Break Torque, only concerning rotations.

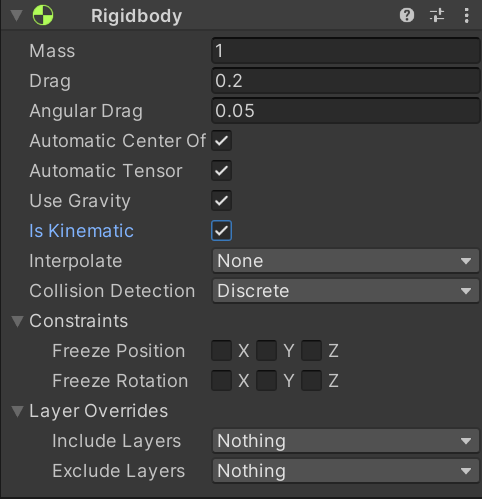
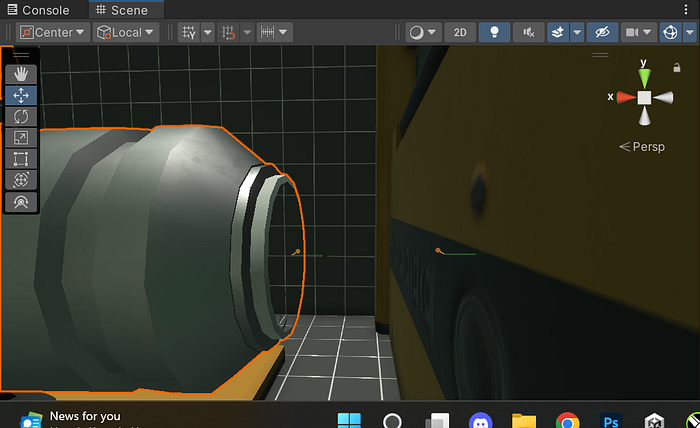
Here is the connected body object that is assigned to the above Fixed joint on the cube. It’s rigidbody has gravity enabled, and is set to is kinematic for now. I will later disable is kinematic as we progress further into the hydraulic arm.
In play mode the cube stays fixed to the head of the hydraulic arm.
Break Force
The break force can be really helpful for breakable joints, so let’s dive deeper into that feature. The cube has a mass of 50 and a break force of 50.
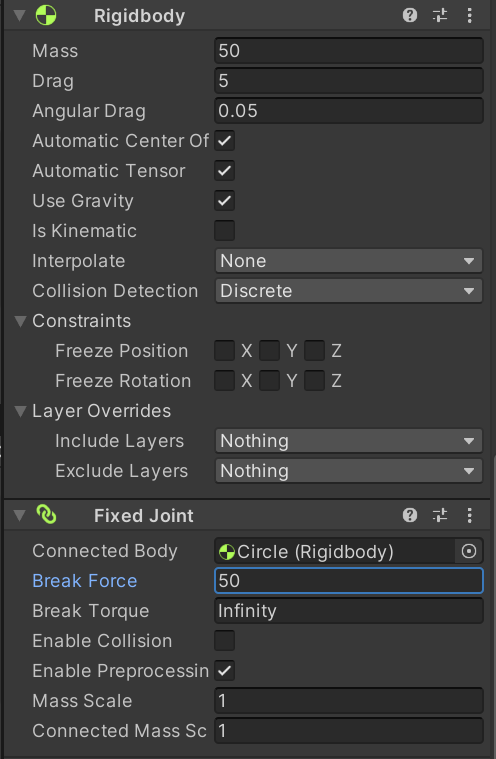
The result is the current overall forces of the cube are too much for the current break force, so it immediately breaks the joint.

Rather than randomly punching in values for the break force to see where the cube stays fixed, you can get that value by calculating the force of the cube. Right now with the drag set to zero and no other outside forces being applied to the cube, I can calculate mass * gravity to get my break force. If you are using drag, you will also need to include that into your calculation.
My calculation comes in at 490.5, where the joint sill breaks under the mass and gravity of the cube. At a value of 490.6, the cube stays fixed until something applies a tiny amount of force to break it away.
This secondary cube has more than enough velocity to break the fixed joint on the bottom cube.
Hinge Joints
Moving along to the head of the hydraulic arm, I now disable the is kinematic option.

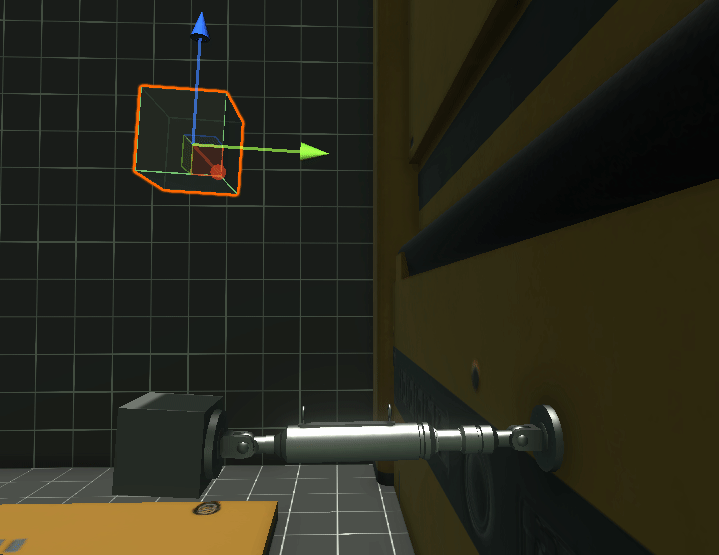
This object uses a Hinge Joint, which has some of the same features as a fixed joint, such as break force and break torque. The Anchor position is used to align the objects rotation point as needed.
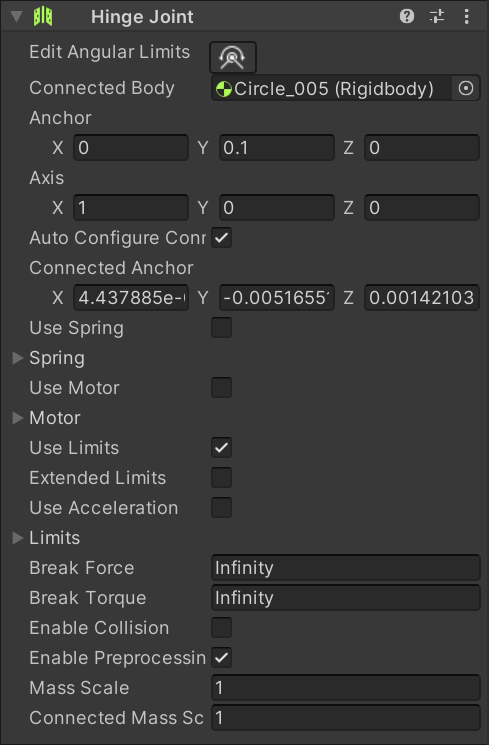
The Edit Angular Limits button lets the user set how far a hinge joint can rotate in a given direction.
You can also enable Use Limits in the inspector and assign or edit the values manually.

The hinge joint works with the weight of the cube, and the piston arm being kinematic for the moment.

Spring Joint
Using another cube for this example, let’s look at the Spring Joint. The Anchor sets the position where the spring is attached to the object with the joint, and the Connected Anchor is the position connected to the Connected Body. A higher spring value will increase the strength and stiffness of the spring.

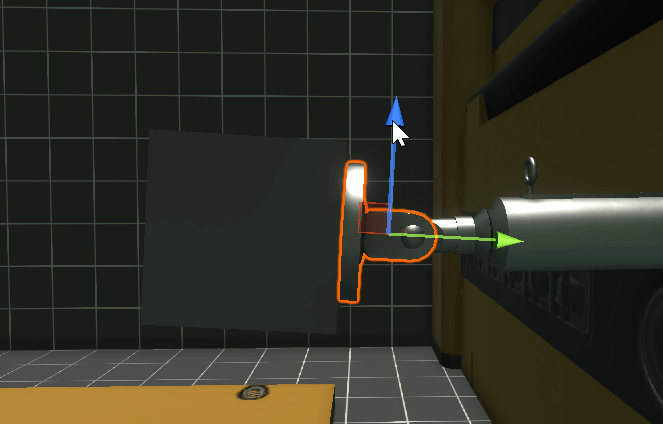
It’s hard to see, but there is a marker in the scene view showing the Anchor positions.

Here is the cube falling and bouncing with the spring joint.

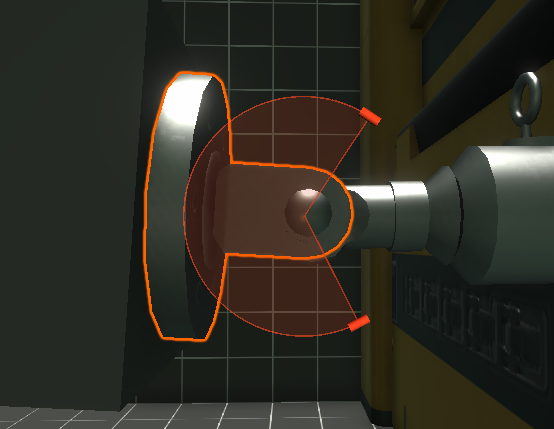
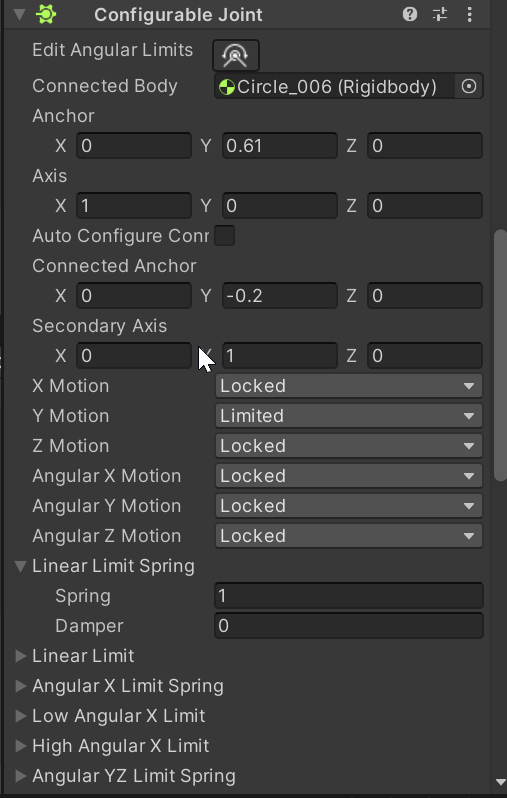
Configurable Joint
The piston object here will use a configurable joint.

The configurable joint has similar options to the other joints such as Anchor, Connected Body and Editing the Angular Limits. This joint however has a plethora of options when it comes to being able to adjust the movement and rotation behavior, per axis. The Motion on the X, Y and Z axes can be set to locked, limited or free. The Angular motion per axis works the same only for rotations. Everything here is locked except the Y motion, which let’s the piston move up and down, limited between the anchor and the connected anchor.
I disabled the mesh renderer on the connected body object to more easily see the anchor and connected anchor positions.
Here you can see the weight of the cube pull the piston downwards, while the spring works and the movement is limited between the anchor points.

I hope you enjoyed this overview of joints in Unity and thanks for reading!